A mini split installation is one of the more rewarding projects a homeowner can take on. Done right, you get efficient, reliable comfort without having to tear into your ductwork.
That said, it helps to go in with clear expectations.
The mechanical work (mounting the indoor unit, running the linesets, sealing penetrations) is well within reach for a capable DIYer. The refrigerant side is a different story. Federal law requires an EPA 608 certification to purchase and handle refrigerants. Most homeowners handle the prep work themselves and bring in a licensed technician for the refrigerant and final startup.
That’s exactly the approach our technicians support every day. If you want help with any part of this, we’re happy to talk it through.
Step-by-Step Guide at a Glance:
Before You Start: Choose the Right Unit and Gather Your Tools
Buying the right size unit matters more than most people realize. A unit that’s too small will run constantly and never catch up. One that’s too large will cycle on and off too quickly, leaving your room feeling clammy.
A common starting point is 20-25 BTUs per square foot as a simple calculation to estimate your needs. You can read our mini split sizing guide for more information about how to calculate the right size mini split. Bump up a size if your space has high ceilings, large south-facing windows, poor insulation, or is a kitchen. Our technicians can help you nail down the right fit if you’re not sure. It’s one of the questions we get most often.
Heat pump or cooling only?
For most Pacific Northwest homes, a mini split heat pump is the better choice. You get heating and cooling in one system, and modern heat pumps work well even on cold winter days. Look for a unit with a low-ambient heating rating if you’re in a colder area.
Once you have the right unit, getting everything together before you start makes the job go smoothly. There’s nothing more frustrating than stopping mid-install for a hardware store run.
Tools you’ll need:
- Drill and a good assortment of bits
- Hole saw (typically 2.5 to 3 inches for the lineset penetration)
- Stud finder
- Level
- Tape measure
- Ladder
Materials you’ll need:
- Mini split system (indoor and outdoor unit)
- Correctly sized lineset (check your unit’s manual)
- Line cover / line hide (PVC raceway to protect and finish the exterior lines)
- Concrete pad and mounting feet for the outdoor unit
- Foam sealant and weatherproof caulk
- Zip ties and pipe insulation if your lineset isn’t pre-insulated
Step 1: Plan Your Layout
A little planning up front saves a lot of headaches later.
For the indoor unit, choose a high spot on the wall with good airflow across the room. Placement requirements can vary by brand, so always check your installation manual before finalizing the location. As a general rule, keep at least 6 inches of clearance above the unit and a few feet on the sides, and don’t install the unit higher than 10 feet from the floor. Avoid placing it directly over where someone sleeps or sits for long periods since constant direct airflow gets uncomfortable.
For the outdoor unit, you need a stable, level surface with open airflow on all sides. Keep at least 12 to 18 inches of clearance around the unit, and more on the fan side. Don’t tuck it into an enclosed space or up against a fence.
For the lineset path, think about the most direct route between the two units. Shorter runs are simpler and less expensive. The lines can run along an exterior wall inside a line cover, which is what most finished installations look like, or through a crawlspace if you want them hidden completely.
Step 2: Mount the Indoor Unit
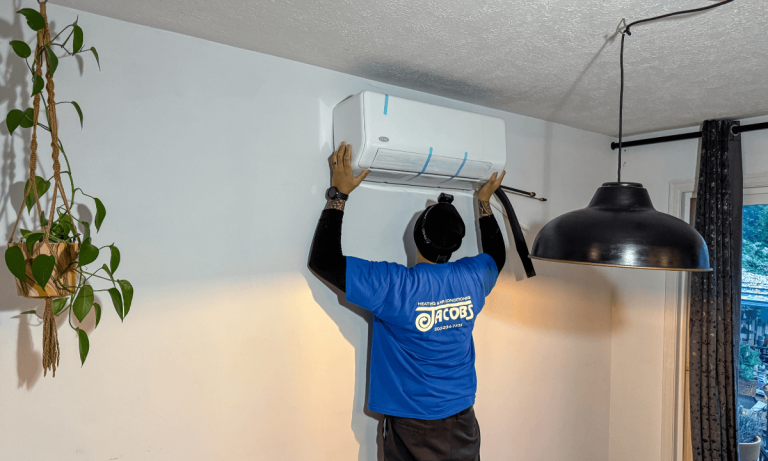
Find your wall location. Use a stud finder to locate the studs. The mounting bracket needs to be anchored into at least one stud, ideally two. Mark your centerline and confirm there’s enough clearance above for the unit.
Install the mounting bracket. Hold the bracket at the correct height, typically 6 to 8 inches from the ceiling, but check your manual. Use a level to confirm it’s perfectly horizontal before you drive a single screw. A crooked bracket means a crooked unit, and a crooked unit means condensate draining to the wrong side and dripping into the room.
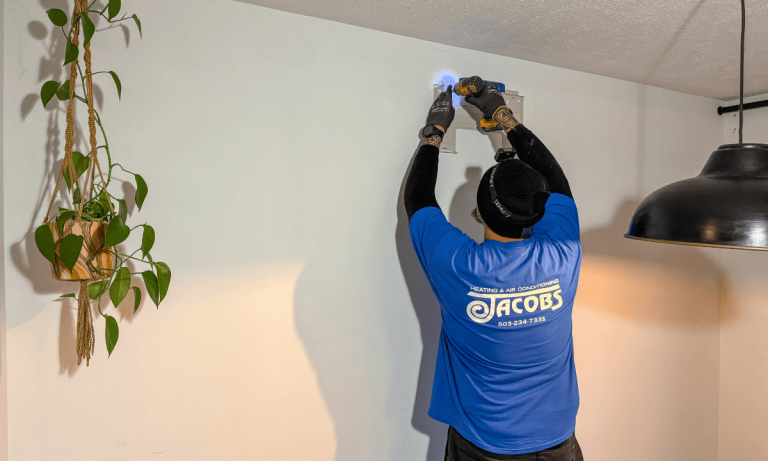
In the photo above, a Jacobs technician is drilling the bracket into place high on the wall, close to the ceiling. Notice the care taken to get it level and solid before moving on.
Drill the wall penetration. All of your lines, the refrigerant tubes, the drain hose, and the communication wire, pass through one hole in the wall. This is typically 2.5 to 3 inches in diameter. Drill it at a slight downward angle toward the outside so moisture drains away from the house, not into it.
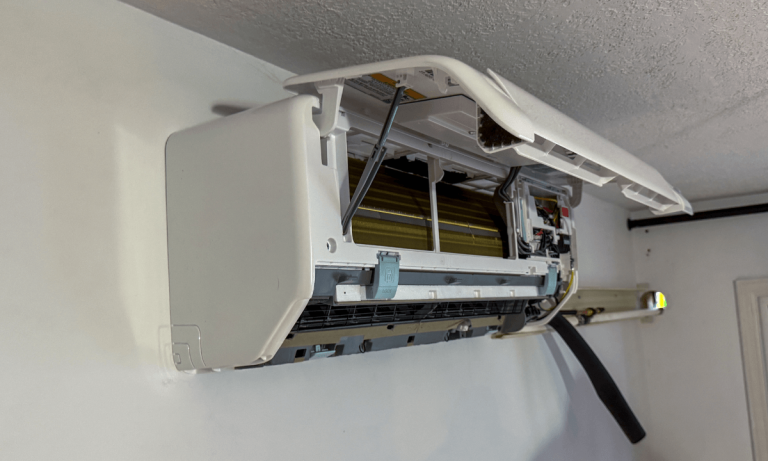
Route the lines and hang the unit. Push the lineset, communication wire, and drain hose through the wall. Leave enough slack on the interior side to make your connections comfortably. Open the front panel of the air handler to access the wiring and refrigerant connections inside, then connect everything per the manufacturer’s diagram. Once that’s done, lift the unit onto the bracket and hook it into place.
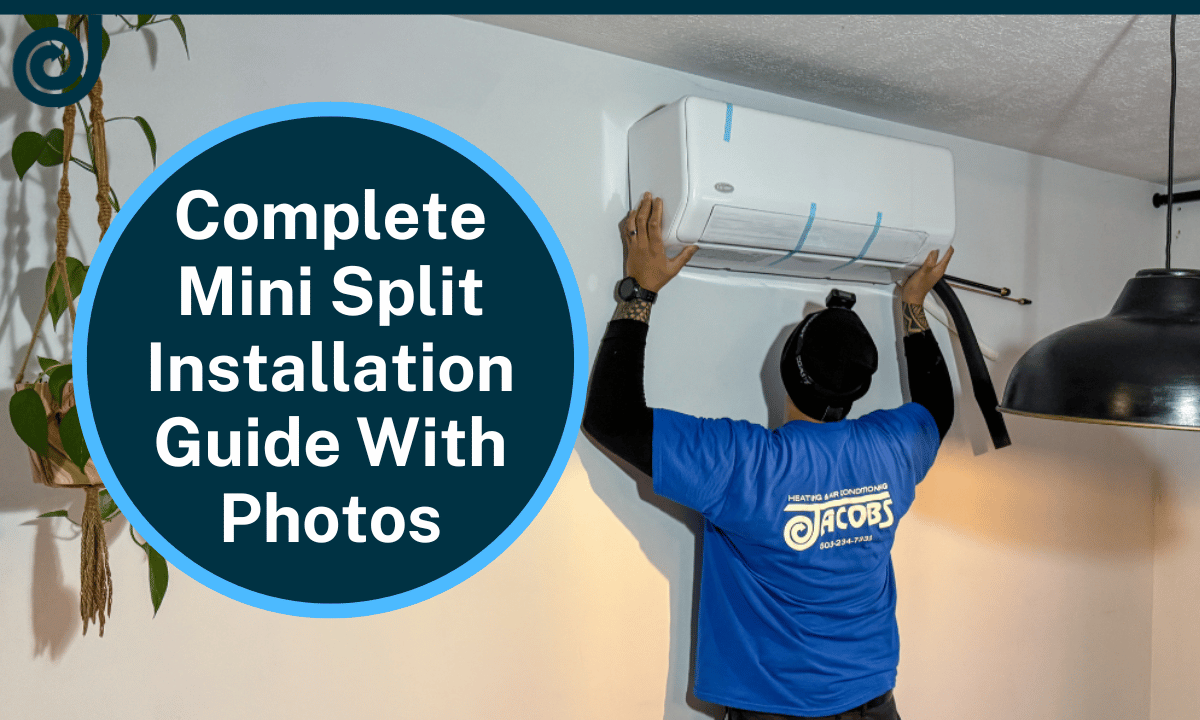
The indoor unit you see in these photos is a Carrier, a brand we’ve worked with for years and trust for reliability. Leave the blue protective tape on the housing until everything is fully installed.
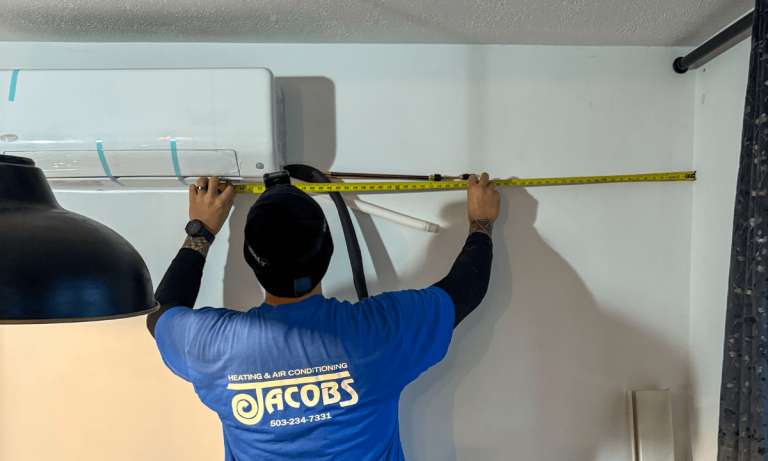
Measure your line cover run. Before the lines go outside, measure the full path they’ll travel along the wall. Line cover comes in fixed-length sections, and precise measurements mean clean cuts and a finished look.
Step 3: Run the Linesets
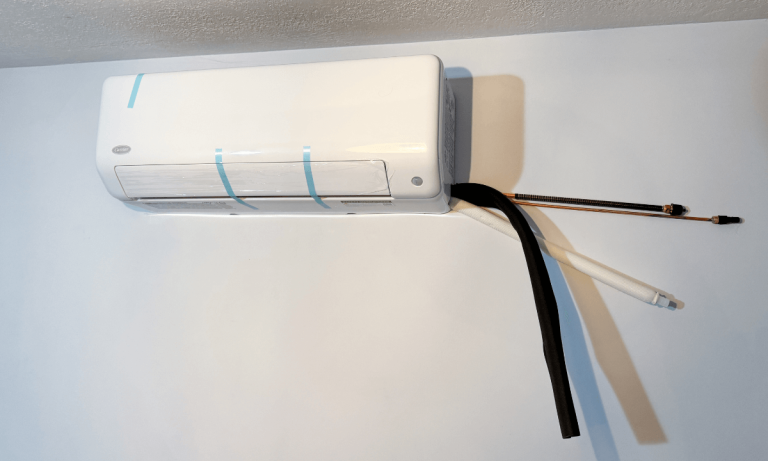
The lineset is the bundle connecting your indoor and outdoor units. It contains two copper refrigerant lines, the communication wire, and the condensate drain hose.
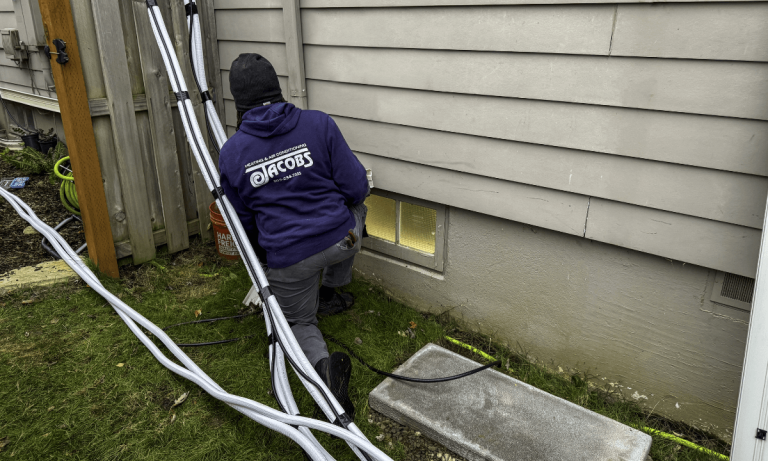
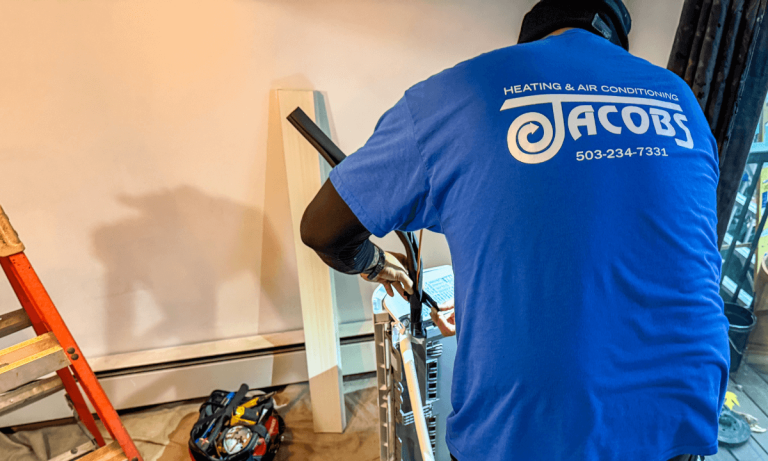
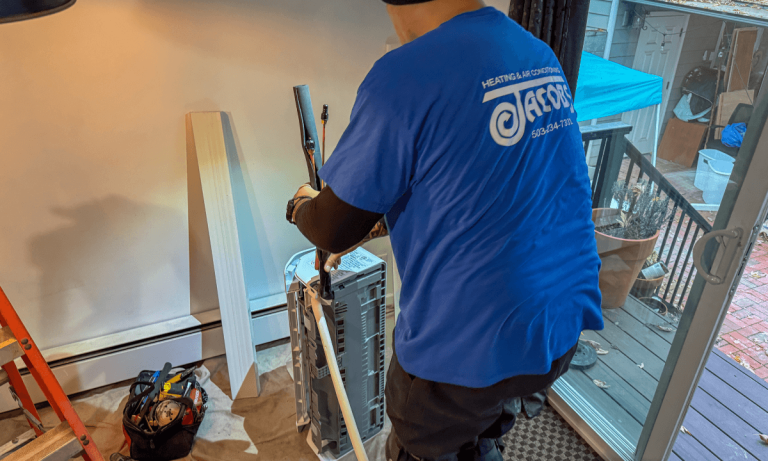
Along exterior walls, the lineset travels inside a PVC line cover, sometimes called a line hide or raceway. Secure the channel base to the wall first, and then secure the lines in the channel or line hide. This is necessary as the cover alone won’t hold the lineset firmly against the house. Finally, snap the cover closed. It should look clean and intentional when you’re done.
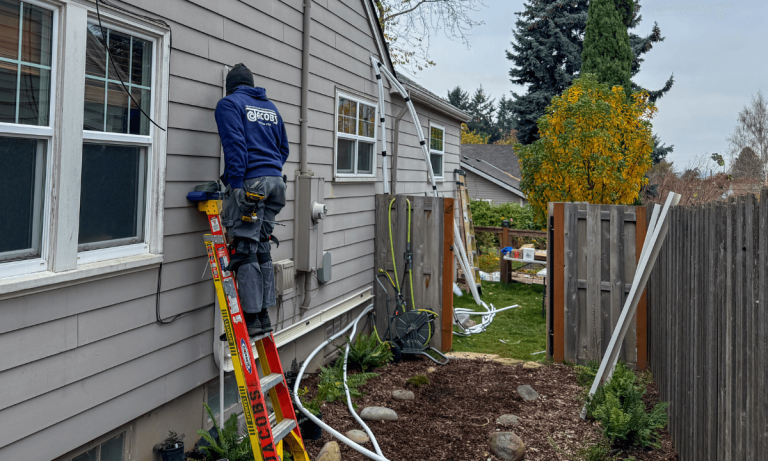
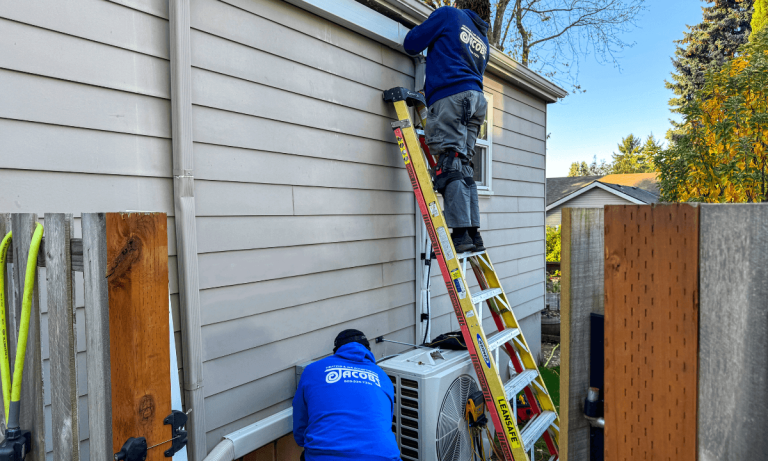
In this installation photo, you can see our technician on a ladder routing the line cover down the side of the house. The lines exit just below window level and run vertically down to the outdoor unit location.
Through a crawlspace, the lines run hidden and never touch the exterior wall at all. This takes more effort and careful measurement to avoid kinks, but it’s worth it when appearance matters.
Step 4: Set the Outdoor Unit
The outdoor condenser is heavy, so plan for two people to move it into position.
Prepare the base. The unit needs a firm, level surface that won’t shift or settle. A pre-cast concrete pad is the most common solution, which is what you see in this installation. Set it on compacted ground and confirm it’s level in both directions before you set the unit down.
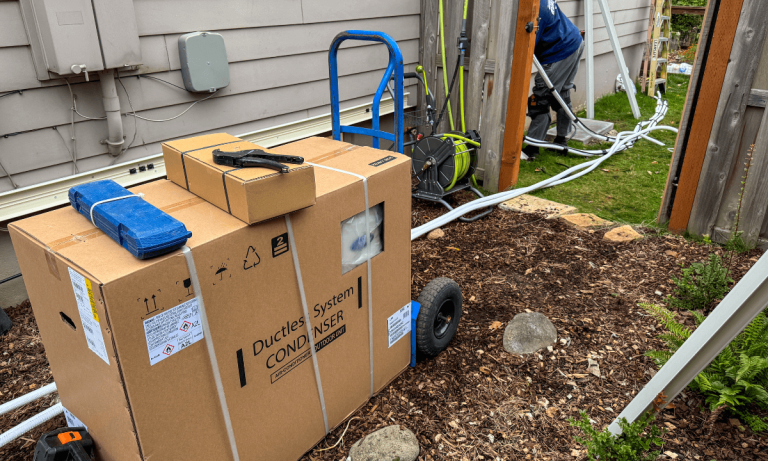
When the condenser arrived on site for this job, it came boxed on a hand truck (the right way to move it). Keep it upright. If it was ever transported on its side, let it stand upright for at least 24 hours before starting it so the compressor oil can settle back into place.
Position the unit. The unit should be positioned to discharge away from the house. Leave proper clearance on all sides, the fan discharge side needs the most room, usually 18 to 24 inches minimum. Don’t block it with a fence, shrub bed, or a decorative enclosure without accounting for airflow.
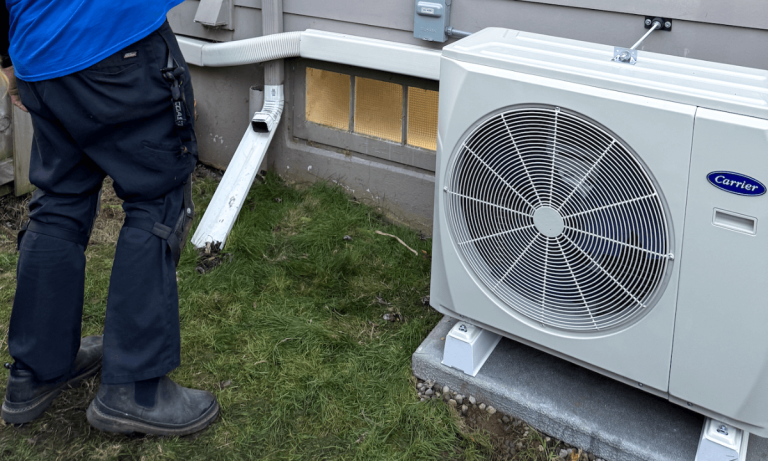
The outdoor unit in this installation sits on a concrete pad right along the side of the house, with the white line cover running cleanly up the wall to the penetration above. That’s a tidy, professional result.
Disclaimer: The refrigerant and electrical work outlined in the next steps must be performed by a licensed HVAC technician. Federal law prohibits anyone without an EPA 608 certification from purchasing or handling refrigerants or working on a sealed refrigerant system. We’ve included these steps so you understand what the process involves and what a proper installation looks like, not as instructions to do it yourself. If you need help with this part of the job, talk to our team and we’ll take it from there. Read our guide for more information about how much mini split installation costs.
Step 5: Making the Connections
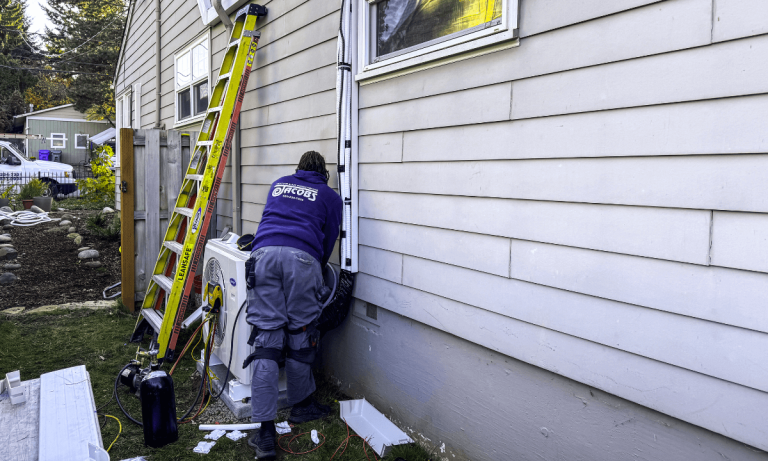
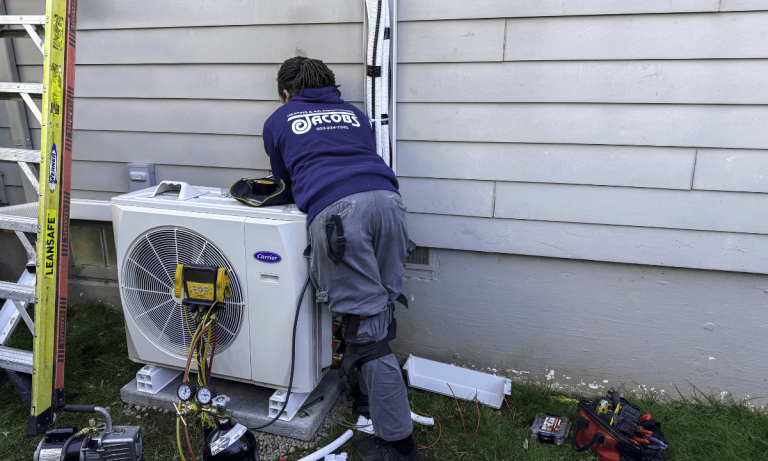
Your technician will connect the copper refrigerant lines to the outdoor unit’s service valves using flare fittings, tightened to the manufacturer’s exact torque spec. They’ll also run the electrical wiring from your panel to the disconnect box and into the unit, and connect the communication cable between the indoor and outdoor units.
Step 6: Vacuum and Leak Testing
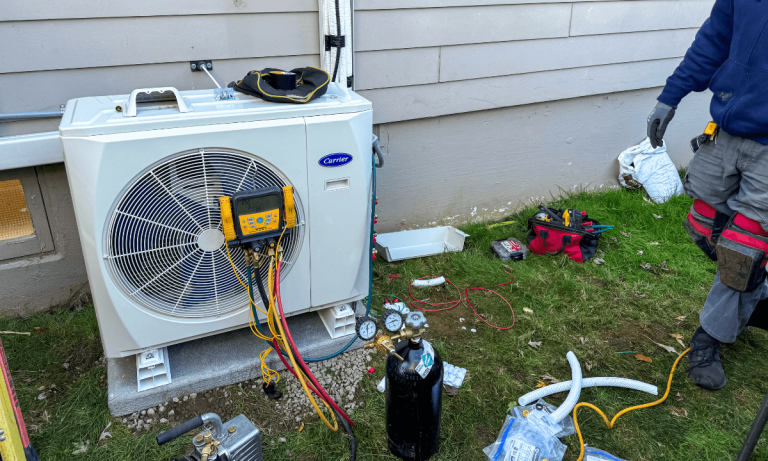
Your technician will connect a manifold gauge set to the outdoor unit’s service ports and use a vacuum pump to remove all air and moisture from the refrigerant circuit. This process, known as triple evacuation, brings the system down to 500 microns (a pressure level low enough to confirm all air and moisture have been removed). Once stabilized, it needs to hold under 1000 microns for at least 10 minutes before moving on. Many technicians also do a preliminary nitrogen pressure test to catch any leaks before pulling vacuum. Both tests confirm the system is sealed and ready to charge.
Step 7: Starting the System
Once the vacuum holds, your technician will open the service valves to release the factory refrigerant charge into the full system. If your line run exceeds the factory-charged length (usually 25 feet), they’ll add refrigerant using a calibrated scale. After powering the system on, they’ll let it run for 15 to 20 minutes, check for error codes, confirm condensate is draining properly, and verify the system is delivering properly conditioned air before wrapping up.
FAQs About Mini Split Installation
How do mini splits work?
A mini split moves heat between the indoor and outdoor unit rather than generating it from scratch, which is why they’re so efficient. The indoor unit delivers conditioned air directly into the room with no ductwork needed.
Is DIY mini split installation possible?
The mechanical work is manageable for a handy homeowner, but the refrigerant side requires an EPA 608 certification and must be handled by a licensed technician. Many homeowners do the prep work themselves and bring in a pro to finish the job.
How big of a mini split do I need?
A common starting point is 20 BTUs per square foot, but ceiling height, insulation, window size, and climate all affect the final number. Our team can help you nail down the right size before you buy.
Do mini splits heat and cool, or just cool?
Most mini splits are heat pumps, meaning they both heat and cool your home. For Pacific Northwest homeowners, a heat pump model is almost always the better choice over a cooling-only unit.
Do mini splits work in cold weather?
Modern mini split heat pumps are designed to work efficiently well below freezing, with many models rated down to 0°F or lower. If you’re in a colder area, look for a unit with a low-ambient heating rating.
How long does mini split installation take?
A straightforward single-zone installation typically takes one full day. More complex jobs with longer lineset runs or difficult wall penetrations may take longer.
Do I need a permit to install a mini split?
In most areas, yes. Electrical work almost always requires a permit, and many jurisdictions require one for the mechanical work as well. We handle the permitting process for all of our installations.
How far can the outdoor unit be from the indoor unit?
Most single-zone systems support lineset runs of 25 to 50 feet, and some can go longer with additional refrigerant. The shorter the run, the simpler and less expensive the installation.
Get a Quote for a Mini Split Installation
Jacobs Heating & Air Conditioning has been helping Portland and Vancouver area homeowners stay comfortable for over 70 years. If you’re considering having a mini split system installed, our team of certified HVAC professionals are ready to guide you through every step of the process. We can help you choose the right HVAC system for your needs and provide a detailed cost estimate for a smooth and hassle-free installation.
Our commitment to quality service and customer satisfaction is what has kept us in business all these years and stand by that. Call us at (503) 558-3774 or contact us online with any questions you may have about mini split installation.


